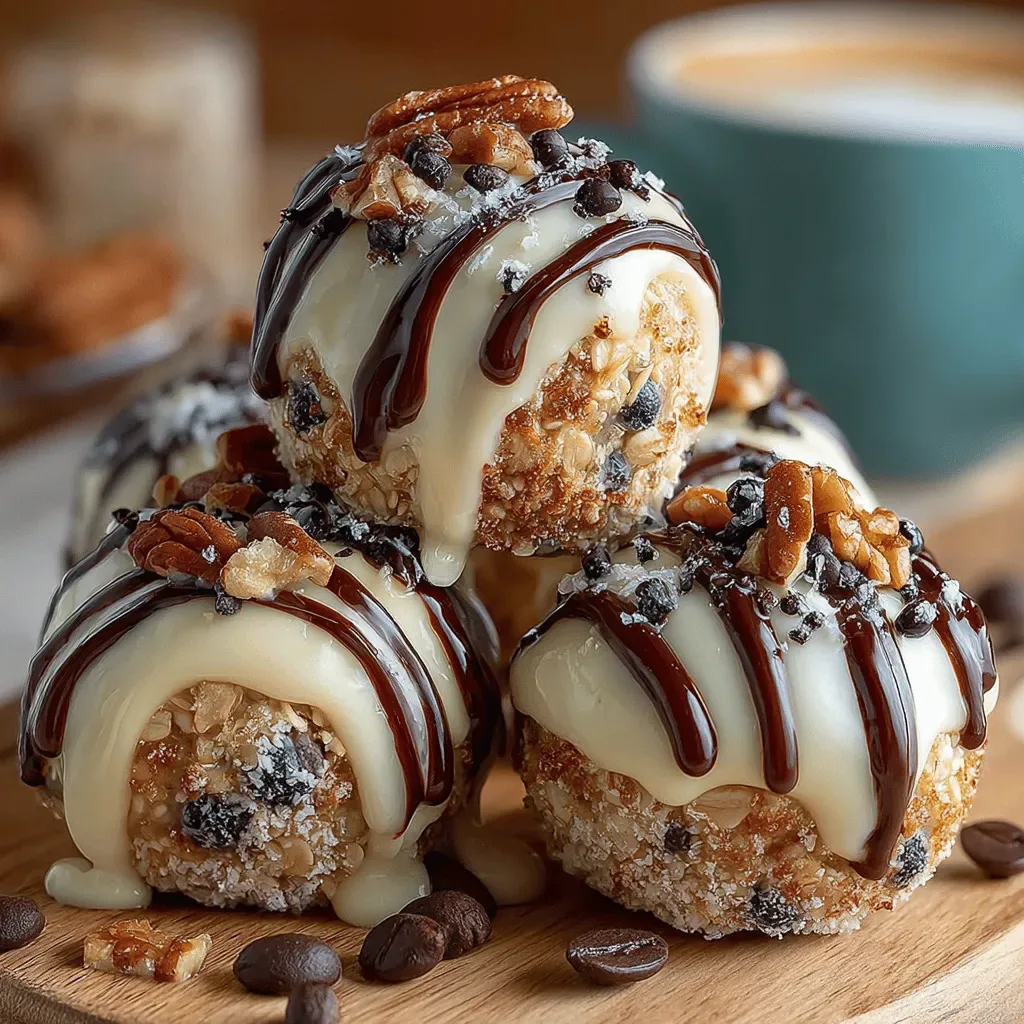
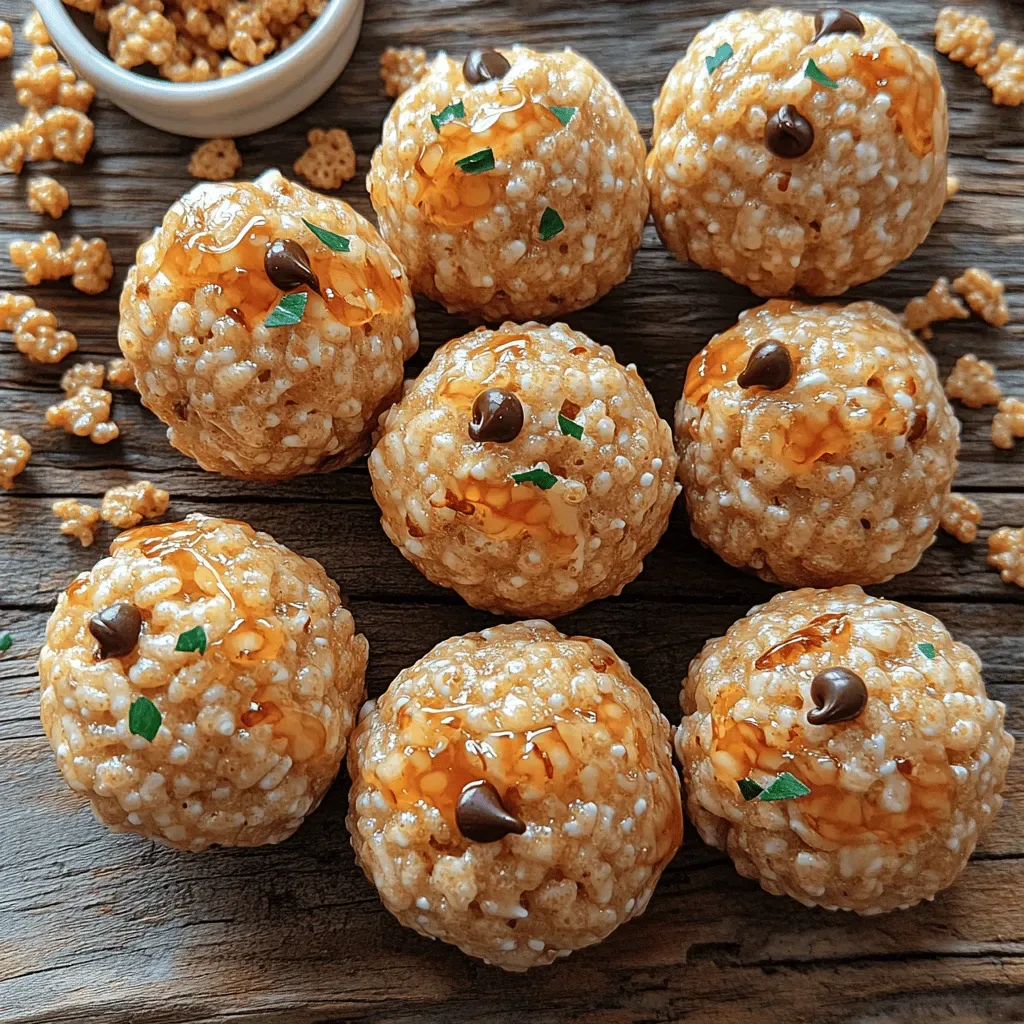
Imagine a bite‑sized breakfast that delivers a satisfying crunch, a creamy peanut butter center, and just enough natural sweetness to start your day on a high note. That’s exactly what these Crunchy Peanut Butter Bliss Balls deliver—no baking required, just a handful of wholesome ingredients and a few minutes of work.
What makes this recipe stand out is the contrast between the toasted oat‑nut coating and the silky peanut butter core, all brightened by a hint of vanilla and a dash of sea salt. The texture is addictive, while the flavor stays balanced and not overly sweet.
Busy parents, brunch‑loving friends, and anyone craving a portable protein boost will adore these balls. Serve them at a weekend brunch, pack them for a quick breakfast on the go, or pop a few into a lunchbox for an afternoon pick‑me‑up.
The process is straightforward: toast the dry ingredients, blend a smooth peanut butter mixture, roll everything together, and chill until firm. In under half an hour you’ll have a batch of blissful bites ready to enjoy.
Why You'll Love This Recipe
Texture Magic: The toasted oat‑nut coating gives a satisfying crunch that contrasts beautifully with the creamy peanut butter interior, creating a bite that’s both hearty and melt‑in‑your‑mouth.
No Oven Required: All you need is a stovetop and a refrigerator, making these bliss balls perfect for kitchens without a working oven or for hot summer days.
Protein‑Packed: Peanut butter, oats, and a touch of chia seed deliver a solid protein boost, keeping you full and energized through busy mornings.
Customizable Sweetness: The recipe uses just enough honey to sweeten naturally, but you can dial the sweetness up or down without compromising texture.
Ingredients
The foundation of these bliss balls is a blend of rolled oats, chopped nuts, and toasted seeds that provide crunch and fiber. Creamy natural peanut butter forms the heart of each bite, while honey and vanilla add a gentle sweetness and aromatic depth. A pinch of sea salt lifts the flavors, and chia seeds contribute a subtle nutritional boost without altering texture.
Dry Mix (Crunchy Base)
- 1 ½ cups rolled oats
- ½ cup chopped almonds
- ¼ cup unsweetened shredded coconut
- 2 tablespoons chia seeds
Peanut Butter Center
- ¾ cup natural creamy peanut butter
- ¼ cup honey (or maple syrup)
- 1 teaspoon pure vanilla extract
- ½ teaspoon flaky sea salt
These ingredients work together to create a balanced bite. The oats and nuts provide a sturdy scaffold that holds the ball together, while the chia seeds absorb a tiny amount of moisture, helping the mixture stay cohesive. Peanut butter delivers richness and protein, and the honey‑vanilla duo adds just enough sweetness to make the balls addictive without being cloying. A final sprinkle of sea salt amplifies every flavor, ensuring each bite feels complete.
Step-by-Step Instructions

Toasting the Dry Mix
Heat a large skillet over medium heat and add the rolled oats, chopped almonds, shredded coconut, and chia seeds. Stir constantly for 4‑5 minutes until the mixture turns golden and releases a nutty aroma. Toasting intensifies flavor and creates the signature crunch. Transfer the toasted blend to a wide bowl to cool slightly—this prevents the heat from melting the peanut butter later.
Preparing the Peanut Butter Core
While the dry mix cools, combine the creamy peanut butter, honey, vanilla extract, and flaky sea salt in a medium bowl. Whisk until the mixture is smooth and glossy. The honey not only sweetens but also acts as a natural binder, ensuring the peanut butter stays pliable enough to roll.
Forming the Balls
- Shape the Center. Scoop a heaping tablespoon of the peanut butter mixture and roll it between your palms to form a smooth ball about 1‑inch in diameter. This creates a uniform core that will stay centered during coating.
- Coat with Crunch. Press each peanut‑butter ball into the toasted oat‑nut mixture, turning it until every side is fully covered. The dry mix adheres quickly because the warm peanut butter slightly melts on contact, creating a firm crust once chilled.
- Chill to Set. Place the coated balls on a parchment‑lined tray and refrigerate for at least 15 minutes. Chilling solidifies the outer layer, giving the balls a satisfying snap when bitten into.
Final Touch & Serving
After chilling, give each ball a final dusting of sea salt or a drizzle of melted dark chocolate if you desire extra decadence. Serve them straight from the fridge for a refreshing bite, or let them sit at room temperature for 5 minutes if you prefer a softer texture. Store the remainder in an airtight container to maintain crunch.
Tips & Tricks
Perfecting the Recipe
Cool the Toasted Mix. Allow the dry mixture to cool completely before coating. Warm crumbs can melt the peanut butter, resulting in a soggy exterior.
Use a Cookie Scoop. A small cookie scoop (1‑tablespoon size) guarantees uniform ball size, making portion control effortless.
Chill the Peanut Butter. If your peanut butter is too soft, refrigerate it for 10 minutes before shaping. This prevents it from spreading too much during coating.
Flavor Enhancements
Add a pinch of cinnamon or cocoa powder to the dry mix for a warm spice note. For a tropical twist, fold in finely shredded dried mango or a few chopped dried apricots. A drizzle of almond butter over the finished balls adds depth without overpowering the peanut flavor.
Common Mistakes to Avoid
Skipping the cooling step after toasting often leads to a soggy coating. Also, avoid over‑mixing the peanut butter blend; excessive stirring can incorporate too much air, making the core less dense. Finally, don’t forget to refrigerate—without chilling the outer crust won’t set properly.
Pro Tips
Toast in Batches. If making a large batch, toast the dry ingredients in two smaller batches to ensure even browning.
Seasonal Nuts. Swap almonds for toasted pecans or walnuts during fall for a richer, buttery flavor profile.
Freeze for Longevity. After the initial chill, you can freeze the balls for up to three months. Thaw briefly at room temperature before serving.
Variations
Ingredient Swaps
Swap the almond pieces for toasted pumpkin seeds or sunflower seeds for a different crunch. Use almond butter or cashew butter in place of peanut butter for a milder nutty flavor. Replace honey with agave nectar or a sugar‑free syrup if you need a lower‑glycemic option.
Dietary Adjustments
For a vegan version, choose a plant‑based peanut butter without added honey and substitute maple syrup for sweetness. Gluten‑free eaters can be confident—rolled oats are naturally gluten‑free when certified, and all other ingredients contain no gluten. To make it keto‑friendly, reduce the oats to ¾ cup and increase the almond flour, while swapping honey for erythritol‑based syrup.
Serving Suggestions
Pair these bliss balls with a tall glass of almond milk or a fresh fruit smoothie for a balanced brunch. They also make a delightful topping for overnight oats, adding texture and protein. For a savory twist, drizzle a thin line of soy‑ginger glaze over the balls and serve as a snack alongside miso soup.
Storage Info
Leftover Storage
Allow the balls to cool completely, then transfer them to an airtight container. Store in the refrigerator for up to 5 days; the chill keeps the coating crisp and the interior creamy. For longer keeping, freeze in a single layer on a tray, then move to a zip‑top bag—this prevents them from sticking together.
Reheating Instructions
If you prefer a softer, slightly warm bite, microwave a single ball on medium power for 10‑12 seconds, then let it sit for a moment. For a crispier exterior, pop the frozen balls in a pre‑heated 300°F oven for 5‑7 minutes; this revives the crunch without melting the interior.
Frequently Asked Questions
This Crunchy Peanut Butter Bliss Balls recipe delivers a perfect blend of texture, protein, and natural sweetness—all without turning on the oven. By following the detailed steps, tips, and storage advice, you’ll consistently produce bite‑size delights that brighten any breakfast or brunch table. Feel free to experiment with nut‑butter swaps, spice additions, or seasonal mix‑ins to make the recipe truly yours. Enjoy the satisfying crunch and creamy center, and share the bliss with friends and family!